Instructions for Lutterloh System®

You also want an ePaper? Increase the reach of your titles
YUMPU automatically turns print PDFs into web optimized ePapers that Google loves.
The golden Rule<br />
®<br />
since 1935<br />
The ideal<br />
Do-it-yourself<br />
Pattern making method<br />
32079841_Goldener_Schnitt_GB_HG_hellgrau.indd 1 13.04.17 14:59
<strong>Lutterloh</strong> System ® P.O. Box 3149 D-88113 Lindau / Germany<br />
% 49-(0)83 82/78515 FaX 49-(0)83 82/74949 www.lutterloh-system.de<br />
Revised Edition<br />
© Copyright MCMLXXXVII, MMXV, MMXVI, MMXVII<br />
by Modeverlag <strong>Lutterloh</strong><br />
All rights reserved. No part of this publication may be reproduced, stored in a retrieval<br />
system, or transmitted, in any <strong>for</strong>m of by any means, electronic, mechanical, photocopying<br />
or otherwise, without the prior written permission of the publisher.<br />
modeverlag <strong>Lutterloh</strong>, P.O. Box 3149, 88113 Lindau, Germany<br />
Printed in Germany<br />
32079841_Goldener_Schnitt_GB_HG_hellgrau.indd 2 13.04.17 14:59
The golden Rule<br />
Making fashionable, professional looking clothing,<br />
re quires complete control over fabric, style and fit.<br />
Choosing and making your own pattern, is the ideal<br />
way to create your individual style and achieve<br />
consistently proper fitting garments. The <strong>Lutterloh</strong><br />
Pattern System is the perfect solution <strong>for</strong> today’s<br />
busy sewer.<br />
Fashion conscious sewers from around the world<br />
have been using the <strong>Lutterloh</strong> method <strong>for</strong> decades,<br />
beginners and professionals alike. This system is<br />
quick and easy to learn. Astonishingly simple, you<br />
need only two measurements to make a perfect<br />
fitting pattern every time.<br />
Enjoy the pattern collection and a<br />
lifetime of sewing pleasure!<br />
„Sewing <strong>for</strong> yourself is economical and fulfilling,<br />
when you create clothes that fit well.“<br />
32079841_Goldener_Schnitt_GB_HG_hellgrau.indd 3 13.04.17 14:59
1. Bust measurement<br />
Use the end of the metric tape. Lift the tape over the<br />
shoulder blades, under the arms and over the fullest<br />
part of the bust.<br />
This measurement is used to enlarge all pattern parts<br />
above and including the waist, ie: collar, necklines,<br />
sleeves, front and back upper bodice pieces.<br />
32079841_Goldener_Schnitt_GB_HG_hellgrau.indd 4 13.04.17 14:59
2. Hip measurement<br />
Take the widest measurement between the waist and<br />
knees, this is your hip measurement.<br />
This measurement is used to enlarge all pattern parts<br />
below the waist.<br />
For skirts, trousers and shorts you only need the hip<br />
measurement.<br />
32079841_Goldener_Schnitt_GB_HG_hellgrau.indd 5 13.04.17 14:59
3. Placing diagram on paper<br />
Place a piece of pattern making paper on the table.<br />
Fasten the chosen pattern onto the paper, by applying<br />
scotch tape at two corners.<br />
The pattern diagram is located on the reverse side of<br />
the illustrated design.<br />
All pattern pieces are marked with symbols, ie: A = front,<br />
B = back, etc. All symbols are located on the Symbols<br />
Page at the end of this instruction section.<br />
You can rein<strong>for</strong>ce the cross with adhesive tape so that<br />
the pattern design doesn’t tear.<br />
32079841_Goldener_Schnitt_GB_HG_hellgrau.indd 6 13.04.17 14:59
4. Inserting the pin into the scale<br />
The sizing scale is attached to one end on the metric<br />
tape. On the scale are two rows of numbers, red and<br />
black, ranging from 50 to 140 cm. These numbers<br />
represent the bust or hip measurements. Every number<br />
has a line with a small hole. Push the special pin through<br />
the hole that denotes your bust or hip measurement.<br />
Should you measure an odd number go to the next<br />
higher even number on the sizing scale.<br />
The differently colored numbers are simply <strong>for</strong> the<br />
purpose of clarity and have no other meaning.<br />
32079841_Goldener_Schnitt_GB_HG_hellgrau.indd 7 13.04.17 14:59
5. Pinning the scale onto the pattern<br />
Carefully push the pin and scale into the center of the<br />
cross point.<br />
Every pattern has a cross point. In some cases the cross<br />
is outside the pattern. An arrow on the cross points<br />
toward the pattern to which the cross belongs. In some<br />
patterns the cross looks like an X so that it can be<br />
recognized easier.<br />
It is advisable to place a protective backing under the<br />
spot where you stick the pin, to avoid damage to your<br />
table.<br />
32079841_Goldener_Schnitt_GB_HG_hellgrau.indd 8 13.04.17 14:59
6. Making dots<br />
The tape rotates freely in any direction. Align the edge<br />
of the sizing scale to any selected line radiating from<br />
the pattern. Extend the measuring tape (in the same<br />
direction). Match the cm number on the pattern, ie: 19. 5<br />
and draw a dot (next to 19 1 / 2 on the extended tape).<br />
The dots are made on the same side of the tape, where<br />
the line and number is shown on the pattern diagram.<br />
If a line is not connected with the dot, use the line to<br />
line up the scale and not the dot.<br />
Always hold the measuring tape straight when you line<br />
up the scale to obtain the correct angle.<br />
32079841_Goldener_Schnitt_GB_HG_hellgrau.indd 9 13.04.17 14:59
7. Completing all dots<br />
Using the bust measurement, make all dots on the<br />
patterns above and including the waist.<br />
Change the pin to the hip measurement and draw all<br />
dots below the waist.<br />
In case that there are more numbers on one line you<br />
need to make more dots on your pattern paper.<br />
32079841_Goldener_Schnitt_GB_HG_hellgrau.indd 10 13.04.17 14:59
8. Connecting the dots<br />
If a dot is out of line, re-align the dot, according to the<br />
pattern diagram.<br />
Connect all dots with our special curves. Draw straight<br />
lines first, using the straight edge of the ruler, and use<br />
curved section to draw armholes, necklines, hip curves etc.<br />
After all dots are connected, transfer all symbols from<br />
the pattern diagram onto your own pattern, ie: arrow<br />
<strong>for</strong> straight of grain.<br />
Remove the pattern diagram and mark the pin hole.<br />
This is where the pattern is adjusted <strong>for</strong> short-waisted<br />
and long-waisted bodies.<br />
32079841_Goldener_Schnitt_GB_HG_hellgrau.indd 11 13.04.17 14:59
9. Cutting the paper pattern and transferring<br />
onto the material<br />
Cut out the paper pattern. The finished pattern now<br />
corresponds to your measurements.<br />
You can adjust the length to suit your individual taste.<br />
Pin the waist dart, according to the shape and size of<br />
your figure.<br />
Place the pattern on the fabric and outline with chalk.<br />
Please note:<br />
Always check pattern <strong>for</strong> correct fit, be<strong>for</strong>e cutting<br />
the fabric!<br />
32079841_Goldener_Schnitt_GB_HG_hellgrau.indd 12 13.04.17 14:59
10. Cutting the material<br />
The finished paper pattern does not include seam and<br />
hem allowance.<br />
Allow approx. 1–2 cm <strong>for</strong> seams and 5–7 cm <strong>for</strong> hems.<br />
The same pattern is used to make facings, linings and<br />
undercollars.<br />
The straight of the grain usually runs parallel to center<br />
front and center back or at a right angle to the waist line.<br />
32079841_Goldener_Schnitt_GB_HG_hellgrau.indd 13 13.04.17 14:59
The <strong>Lutterloh</strong> System ® is based on the principal of the<br />
“Golden Rule”.<br />
The human body is in perfect mathematical proportion<br />
within itself.<br />
H = full length of body<br />
1/2 H = upper part of body<br />
1/4 H = length of leg from ankle to knee and length from chin to navel<br />
1/6 H = length of foot<br />
1/8 H = length of head from crown to bottom of chin<br />
1/10 H = height of face – also length of hand<br />
1/12 H = width of face<br />
Man is the<br />
universal measure<br />
of all things.<br />
The <strong>for</strong>earm, measured from the elbow to the wrist,<br />
corresponds with the length of the foot.<br />
The length of the hand is the same as the length of the<br />
face.<br />
The body height is eight times the length of the head.<br />
The span of laterally outstretched arms, measured from<br />
finger-tip to finger-tip, is equal to the height of the body.<br />
32079841_Goldener_Schnitt_GB_HG_hellgrau.indd 14 13.04.17 14:59
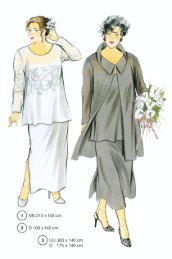
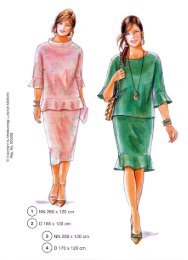
Fabric requirements<br />
For every model the fabric allowance has been calculated<br />
<strong>for</strong> a 94 cm (37”) bust and a 100 cm (40”) hip measurement.<br />
To get the exact amount you need, group all<br />
pattern pieces onto folded fabric, in the most economical<br />
fashion. Pattern pieces with a broken line are placed on<br />
the fabric fold. Watch the straight of the grain, and<br />
remember to add seam and hem allowances. Be<strong>for</strong>e<br />
you sew the pattern pieces together make note of the<br />
alphabetic order of the small letters (a to a, b to b, etc).<br />
Fashion supplements and yearly subscriptions<br />
Certainly you want to be kept up-to-date with the latest<br />
fashions in the future. Our quarterly-published fashion<br />
supplement gives you this opportunity. In each of these<br />
booklets you will find 40 new designs and corresponding<br />
<strong>Lutterloh</strong> patterns. A yearly subscription includes<br />
4 supplements. These seasonal booklets appear in the<br />
middle of February, May, August and November.<br />
Special editions and XXL fashion edition<br />
We also offer special editions with patterns <strong>for</strong> children,<br />
men and classic fashion.<br />
Our XXL edition includes a tape measure of 180 cm<br />
(71”) length with a special blue sizing scale. This can<br />
only be used with the blue patterns that are included<br />
in the XXL edition.<br />
32079841_Goldener_Schnitt_GB_HG_hellgrau.indd 15 13.04.17 14:59
Symbols Page<br />
The pattern making manual is published in 14 languages. The following table<br />
provides letters and symbols which you will find on the model- and pattern pages.<br />
A = front<br />
B = back<br />
C = side<br />
D = skirt<br />
E = sleeve<br />
F = cuff<br />
G = collar<br />
H = belt or waistband<br />
K = pocket<br />
L = yoke<br />
M = coat<br />
N = bow<br />
O = pleated part<br />
P = pullover<br />
R = inset<br />
S = trimmings<br />
T = flounce<br />
U = jabot<br />
Y = pocket flap<br />
Z = trousers<br />
2 x = two times<br />
1 inch = 2.54 centimeters<br />
= straight of grain<br />
= fold (no seam)<br />
= cutting line ✂<br />
= gather<br />
= top stitch<br />
= elastic<br />
= facing<br />
= zipper<br />
AA = cape<br />
BB = tie<br />
CC = loose part<br />
DD = ties<br />
EE = lapel<br />
FF = hood<br />
GG = basic pattern<br />
HH = pleat<br />
HM = center back<br />
LL = buttonhole panel<br />
MM = trim or lace<br />
NN = blouse<br />
OO = shoulder strap<br />
PP = clasp<br />
RR = ruffles, frills<br />
SS = bolero<br />
ST = facings<br />
TT = peplum<br />
UU = jacket<br />
VM = center front<br />
VV = dress<br />
WW = waistcoat<br />
ca. = approximately<br />
li = left part<br />
re = right part<br />
v = front (sleeve)<br />
= press stud<br />
= hook and eye<br />
A to A = sewing sequence<br />
B to B<br />
B = 90° angle<br />
= especially suitable<br />
<strong>for</strong> very slim figures<br />
= may be knitted<br />
or stretch-fabric<br />
= especially suitable<br />
<strong>for</strong> fuller figures<br />
= maternity wear<br />
= contrasting colour<br />
32079841_Goldener_Schnitt_GB_HG_hellgrau.indd 16 13.04.17 14:59